Sunday, November 28, 2010

My Long, Long, IFR Cross Country Flight - NAP

I am tense, anxious and my throat is a little dry as I head to the airport.

I tell myself to, "relax, have fun and don't forget to breathe" but it's not helping much.

I am on my way to Santa Rosa Airport (STS) to fly my IFR long cross country flight. It has been planned and canceled three times. For this reason I have spent a significant amount of time planning and mentally preparing for this flight.

At this point in my training I have 20 hours under the hood and I feel as if I should be more than ready. I know the plane, I know the flight plan, I know the approaches so there should be few surprises, right? Wrong.

After this flight I have a new mnemonic that will become part of every IFR flight plan - NAP. Not As Planned.

First off, I make a fundamental mistake. I forget to file an alternate, even though my first point of intended landing was below the 1-2-3 requirements. How did I miss this in all my "careful" planning? This mistake gnaws at me because I realize how serious it is. "May I have some more anxiety, please sir?".

Secondly, right after I finished my pre-flight and declare the plane airworthy, my flight instructor says, "The right wing looks a little low,"

The wing looks a little low? What the hell is he talking about? I stand back and look at the plane. I have to admit that the right wing does look low. A head measurement confirms it. FYI - a head measurement is when you walk up to the wing and bang your head into it. Then you go to the same point on the other wing and bang your head again. If one bruise is lower than the other, and you know you are on level ground, then something's rotten in Denmark.

I pull out the tire pressure gauge and check the right tire. It's quite a bit low, though it did not look very low. Mental note - an aircraft tire that looks a little low may be a LOT low in reality. I'm still skeptical that this is going to level the wings, however.

Of course the compressed air tank that we keep in the hangar for this reason turns out to be empty. NAP.

I carry a portable air compressor in my car and in a few minutes the tire is full and, low and behold, the damn wings are now level. Add a new pre-flight checklist item - are the wings level?

I find myself getting a little more tense as a result of this confusing delay.

It seems every IFR flight ends up being "NAP". This seems contradictory to me VFR experience. When you plan a flight VFR there are primarily two outcomes - either you fly the plan or you just don't go. Occasionally you will have to divert en route, by rarely.

Yet every IFR flight I make seems to go NAP at some point in the process. This seems to be the hardest part of flying IFR for me.

On one hand, IFR requires rigid planning and attention to every detail. On the other hand, I have learned to expect ATC to change my "rigid plan" before I've completed the departure procedure. Today is no different.

I realize some of the following ATC changes are minor and, in fact, save time. Yet as an IFR student sometimes I just want to fly the route I planned and filed. This would allow me to do things in the order I am expecting with the available time I am expecting.

I am just off STS climbing in the Frees6 departure procedure when ATC clears me "direct Santa Rosa, then as filed." Ok, quick, forget all about the Frees departure, figure out whether to make a left or right hand turn and figure out which heading will take you directly back to Santa Rosa. While your at it maintain your climb rate and airspeed. ATC has thrown me into mental gymnastics and I'm barely off the ground. NAP.

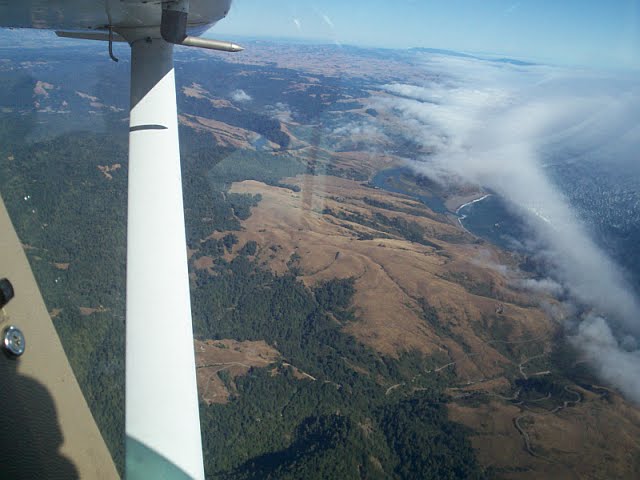
We leave Santa Rosa behind and flying V301 we head into the Central Valley bound for my next fix, Williams VOR. Of course, ATC will not let me fly to the VOR. That would be too simple.
The view over the Central Valley approaching Marysville VOR

"34777, cleared direct Marysville VOR," ATC orders.

"Blow me, Cardinal 34777", I feel like responding. NAP

Leaving the Marysville VOR, the VOR approach into Oroville (OVE) is pretty straight forward. I fly it without any major screw ups. The plan is to go "missed" and then pick up the second leg of our flight up to Redding.

I am in a climbing left turn on the missed approach when something in my scan is not right. My turn coordinator has died. NAP.
So much for standard rate turns today...


It is VFR conditions. I quickly cover the gauge with a post-it. Yet, for some reason this equipment failure increases my anxiety. I remind myself to breath and focus on hte next leg of the flight. This would be V23 to Red Bluff after I reach the Talum intersection. Well, it was supposed to be but, of course, ATC has other ideas.

"34777 cleared direct Red Bluff", says ATC.

I should be expecting this by now. Once I have my IFR rating, and am on a real flight somewhere, I will appreciate this kind routing change. It will save me time and fuel. Today, however, I don't appreciate the consideration.

The ILS Runway 34 at Redding is fairly simple without a bunch of step-down fixes. I fly it well and make a decent landing.

We pull up to the Redding Jet Center for fuel and a potty break. The jet center is a little more upscale than I would have expected and it's a nice place to take a break.
Fueling at Redding Jet Center


I have filed the Homan 2 departure to RBL, V87 down to RUMSY and the V301 to STS. However, once in the air we will request a diversion to Ukiah so that I can fly the Localizer Runway 15. This will meet the requirement for three different approaches.

Surprisingly, I am able to fly the complete plan without any changes. My approach does not go so well. I neglect to account for the tail wind, don't start the timer until late and the combination of the two leaves me directly over Ukiah's runway 15 at the timed point. I would not have been able to make a normal approach to land.

Fortunately the IFR cross country requirements only require me to "fly" three approaches. They don't have to be good ones. Honestly, instead of feeling disappointed in myself over this approach, all I can think of getting out of the plane. Nearly four hours of flying under the hood has worn me out.

I'm hoping my instructor will let me take off the view limiting device and let me fly visual but that doesn't happen. He cancels IFR but continues to give me heading and altitude changes all the way back to STS. My landing is ok and as I start to taxi to the hangar I start to realize just out physically drained I feel. This has been a difficult mental exercise for me. It has made me realize how far I still have to go before I am truly ready to call myself an IFR pilot.

Lessons Learned
- Every IFR flight will end up NAP in some way or another. Plan rigidly but be prepared for deviations at any point in the flight.
- I was not pleased with my heading control. While most of the time I am within the required test standards, that's not good enough. I need to learn to make corrections sooner as well as avoiding heading changes while looking away from the primary gauges (looking at charts, adjusting the GPS, etc.).
- Do a final flight plan the morning of the flight and verify whether or not an alternate is, or may be required, required. It doens't hurt to file an alternate, just in case.
- If the tire looks a little low, take a look at the wings. If they don't look level it's a good chance the tire is really low.
- Be aware of a tail wind on an approach and slow down accordingly. Check the GPS to verify your ground speed is not exceeding the desired approach speed. Keeping the GPS set for nautical miles instead of statute miles will help with this.

The Positive Side
- I felt in control of the flight. I did not get mentally lost and require my instructor to bail me out.
- Two of my three approaches were flown well.
- I dealt with the failure of the turn coordinator without it being a major distraction.
- I handled almost all ATC communications with very little help from my instructor.
- The noise-canceling Lightspeed headsets my instructor loaned me are so much quieter and moire clear than my DC 13.4s. They are now on my wish list.

Some Final Stats For the Flight
Total time on tach: 3.5 hours
Total cost of flight including instructor, fuel and club charges: $537.42
Maximum altitude: 9000 feet
Maximum air speed: 160 MPH
Total duration of flight, including fuel/pee stop: 5 hours
Approaches flown: OVE VOR; RDD ILS Rwy 34; UKI Loc Rwy 15
Approximate air miles flown: 340 nautical miles
Total fuel consumption: 32.9 gallons
Average fuel burn: 9.4 gallons per hour

Saturday, June 26, 2010

Flight Review (AKA Biennial)


Flight Review

This summary lists my personal issues for my flight review. For a complete list of all flight review requirements see:


Much of the information contained in this blog has been borrowed (plagiarized!) from the FAA web site.

Fuel Requirements

  • Day VFR - Destination + 30 minutes at cruising speed (91.151)
  • Night VFR - Destination + 45 minutes at cruising speed (91.151
  • IFR - Destination + alternate + 45 minutes at cruising speed (91.167).

Minimum Equipment Requirements - (Mnemonics Below)


"CAMALSFOOTE"


"FLAP"


"GRABCARD"


Camalsfoote Is Required Equipment For Day VFR Flights

(Note: Please check weight and balance before loading Camel)


Day: 91.205 (b): - CAMALSFOOTE

C ompass
A airspeed indicator
M anifold pressure gauge                                                                     
A ltimeter                                                                                 
L ights, anti-collision                                                     
S seat belts
F uel gauge(s)
O il pressure gauge
O il temperature gauge
T achometer for the engine(s)
E lt – emergency locator transmitter

Night: 91.205 (c): CAMA(L)SFOOT & FLAP

F uses (One spare set of fuses, or three fuses of each kind)
L lights (position lights (nav. Lgts), landing light if for hire or required by manufacturer)
A anti collision light (it also needs to be on at day per 91.209)
P ower source (adequate source of electrical power. Battery or alternator)

Required instruments for IFR flight - GRABCARD
(Plus all required equipment in (b) and (c) above

G enerator or Alternator
R ate of turn indicator
A djustable altimeter
B all for coordinating turns
C lock (panel mounted)
A ttitude indicator
R adio
D irectional Gyro


Airport Markings

I wish someone could explain to me why airport markings have to be so confusing. The color codes and symbols have very little intuitive relevance. Here's a thought - since you have to read and speak English to fly anywhere in the world, why not use plane English on the signs??? "Runway 14-32"; "Taxiway D", Hold short (plus symbol); etc. I am of the opinion that many airport accidents are the result of pilots misunderstanding or misinterpreting the hieroglyphic symbols and color schemes. Just use English, dammit!

Until then we're stuck having to memorize this crap:


Saturday, May 15, 2010

Pre-flighting Airport?

Say what? Traffic pattern altitude, radio frequency and runway layout is all you need to know for landing on most VFR flights, right?

I used to believe that until I recently began having a few problems. Ok, more than a few problems.

One of these days I just want to wake up and know EVERYTHING about flying. No more writing, no more studying, no more learning. I’m going to enjoy that day when it comes. I think it is getting pretty close. It has to be, because it feels like my brain is almost full.


Here’s my list of airport problems I’ve had recently. I’m not talking about the last twenty years here, I really mean recently:

For VFR Flights
· METARS?
· Food on field?
· Car rental?
· FBO?
· Review terrain for approach flight path
· Review with local pilots or tower local reporting points
· Review terrain for pattern entry and descent terrain clearances, including clearances for each leg of pattern
· Review location of obstacles in the airport vicinity - towers, power lines, buildings
· Review published pattern entry procedures (non-standard?)
· Review published pattern altitude
· Local noise abatement procedures?
· Parachuting, helicopters, air tankers, kites, antique aircraft, gliders, jets in the vicinity?
· Runway length – short runways require close attention. Be prepared for go-around on short runways If things don’t look right
· Runway width – wide runways higher than normal; narrow runways can make you fly s lower than normal pattern
· Rwy elevation – density altitude concerns – even a 2000 ft airport can affect performance on a hot day. You do not have to be in the mountains.
· Sloped or humped runway? You may not be able to see the other end on landing or takeoff
· End of runway condition: rising terrain or drop-off can cause unpredictable winds on short final or takeoff; paved areas can cause rising air and turbulence; grass or water can cause sinking air which will require the quick addition of power on short final or make
obstacle clearance questionable on departure; houses, buildings, power lines, towers can cause distractions on approach or departure.
- Is the sun going to be in my eyes on short final? This can blind you at a critical moment.
· Fuel available? Price? Self-serve?
· Tie-down fees?
· Landing aids – VASI, PAPI?
· Location of wind sock or tetrahedon?
· Tie down chains/ropes available?
· Taxiway or runway back-taxi?
· Control tower hours of operation?
· Pilot controlled lighting? What is the frequency? It is not always the same at the CTAF!
· When landing at mountain strips - is a go-around possible? Some strips are one-way only.
· How will I spot the airport as I approach it? Google Earth; landmarks, terrain references; GPS? (All of the above?)
· How high should I approach to aid in spotting airport?
· Are landing and taxiway lights available for night landings? How are they controlled? What are the options if I get there after dark and they don’t work?
· What types of accidents have occurred at this airport? Ok, this may not be something you check for every landing, however, if you are going into difficult terrain this may help identify areas of concern. The AOPA Airports web site has a direct link to accident reports from the selected airport.
· Other airports in the vicinity? One reason to know this is in case you cannot land at your primary airport due to winds, runway obstructions, etc. Another reason is to be aware of conflicting traffic if the other airport is in close proximity.
· Runway condition?
· "VV"= vertical visibility. This not only applies to IFR landings but should also be considered for VFR arrivals and departures. This number indicates the high above the ground where you will no longer be able to see the ground.
· For all take-offs consider safe take-off distance to include the POH allowance for take-off distance PLUS the POH allowance for landing distance PLUS a 10% safety factor. This will provide a safe margin for stopping should you need to abort after reaching take-off speed.
· Can I pee here? (“Salinas tower, Cardinal 34777 3 miles north with Echo, landing Salinas.” “Cardinal 34777, Salinas Tower. We’re showing you at 3 miles north at 7500 feet!?”. “Affirmative, 7500 feet. I have to pee. Give me the clearance and I WILL get down!”. (No, I didn’t make this up…)

· NOTAMS/NOTAMS/NOTAMS! – check them every time!


KAPC ~~~ ARRIVAL AIRPORT NOTAMS ~~~ KAPC     

USD 05/086 APC AIRSPACE LIZRD THREE DEPARTURE OAKLAND TRANSITIONS:
            NA EXCEPT FOR AIRCRAFT EQUIPPED WITH SUITABLE RNAV SYSTEM WITH GPS.
            OAK VORTAC OTS.
APC 05/002 APC AIRSPACE PARAGLIDER ACTIVITY SEE CCR 05/001
            TIL 1103230500


High Density Altitude
When departing from a high density altitude airport the manifold pressure will be reduced approximately 1" for each 1000' of density altitude.

When arriving at an airport with high density altitude land at the same indicated airspeed as normal but understand your ground speed will be higher and be prepared for the different visual perspective.

Consider that high density altitude also affects cruise/climb performance. If the temperature conditions are higher than standard you maximum service ceiling will be lower. This could present a serious problem if crossing mountains or operating at high altitudes. 

For IFR Flights

· Irregardless of the instrument approaches a the airport of intended landing, you may well end up with a circle to land clearance at any of the other runways on the airport. Familiarize yourself with the other runways as you would a VFR arrival.
· You typically make a faster approach on IFR and a short runway may pose a greater challenge for landing.
· Memorize the missed approach before you reach the final approach fix.
· Carefully read the airport data as it relates to trees, towers and other obstructions. Know where they are relation to your approach.
· Circle to land clearances may be at lower altitudes than standard traffic pattern altitudes – again be aware of possible obstructions and standard pattern entries.
· Carefully observe runway conditions prior to landing. With all the other tasks an approach requires don’t forget to look for slippery conditions, obstructions on the runway – and the wind sock! If something isn’t right – go around.

Gary

Sunday, April 18, 2010

806 Landings and I Still Can’t Get It Right


When you fly alone, any landing that doesn’t bounce you back into the air or slam you down hard, seems good enough.

So what if I’m a little too long in the flare? Who cares if I drop in from five feet as long as I’m on the mains? What’s a little bounce if no one is there to notice? 

Why the hell should I stress over whether the tires make that perfect little chirp every time I land?

I honestly think this has been my mindset for some time now.

A recent flight with my wife, Linda, has made me reconsider my attitude about landing. She told me that my landings make her uncomfortable.

This surprised and concerned me. The last thing I want to do is make my best friend and co-pilot uncomfortable in the airplane.

 I spent a little time re-living my most recent attempts at returning 34777 to earth. I had to admit she’s right – my landings are simply not good enough and not just for her sake. They are not good enough for me, either. I realized I have not been happy with them but didn’t want to face the fact until she brought it up.

Here I am in the middle of my IFR training and I need to go back to square one and try and learn the fundamentals of a good landing. This seems wrong somehow. I’m pretty sure smart people don’t have my problems.

I learned to land via the “power off abeam the numbers” technique. I rarely landed fast, but my approaches could not be considered stabilized. The technique is now out of vogue with the FAA, though it is good to practice for engine out emergencies.


The Fundamentals of a Stabilized, Partial Power Landing

The most important concept for stabilized approaches and good landings is to fly the entire approach at the proper airspeed (Cessna Cardinal, Vso = 57 mph):
·         Downwind                Vso x 1.5= 85 mph
·         Base                        Vso x 1.4= 80 mph
·         Final                       Vso x 1.3= 75 mph (at max. gross 15% flaps) ; 70 mph (2300# ; 15% flaps)

Learn the power setting that provides the initial airspeed and attitude. (12” manifold pressure? Check!)

As you enter the downwind, review the pre-landing checklist:
·         Verify the runway you are landing on
·         Runway length?
·         Wind direction and speed?
·         Fuel tank on both; Mixture rich; Prop forward; carb. heat full on; engine instruments; radio frequency confirmed
·         Parallel distance from runway, approx. 45° down

If you fly the approach too fast the following may occur:
·         The pattern will be larger than necessary
·         It will be difficult to stabilize the approach and it will be harder to fly properly
·         You will need to make steeper turns
·         It will take longer to get the plane into a nose-up flare attitude
·         Raises the risk of “dropping in”
·         Runs the risk of ballooning

Abeam the Numbers
Verify the runway number! 

Review runway length AND width. Narrow runways can cause too low an approach. Wide runways may cause too high an approach. Short runways deserve extra consideration - go around if things aren't perfect! 

Reduce power, add a notch of flaps and trim for 85 mph. This should result in a 300 – 400 FPM descent rate.

Note the sight picture over the nose and the angle of the wings to the horizon.

As you make the turn to base do not let the nose drop. Use a little backpressure. Letting the nose drop will increase airspeed, which we do not want in a stabilized approach. There is a tendency to drop the nose to subconsciously avoid the stall/spin scenario. This should not be an issue if the nose is already pitched down and the airspeed is correct.

Turning Base
Add the second notch of flaps; pitch nose down and trim for 80 mph.

Check final approach for traffic.

Review height above touchdown aiming point and make slight adjustments.

On Final
Add full flaps, pitch nose down and re-trim for 70 mph.

Make little corrections early – so slight that your passengers do not notice.

If too low, bring power up and nose up. DO NOT RE-TRIM. Once you are back on the glide path the plane will return to the pre-set trim speed.

If too high, bring power back and pitch down. DO NOT RE-TRIM.

At an altitude of 20 to 30 feet, pull off the power completely. 


As you get near the runway look overt the left side of the cowling and 100 to 200 feet ahead. Don’t fixate, keep your scan moving. Do not look straight down. The blurring effect may be interpreted by your brain as being the correct time to flare when, in fact, you are still too high.


If too high, do not move the yoke forward. This can cause a nose gear strike. If the runway is short – go around.

Ensure the plane is not drifting to one side or the other that would impose side loads on the landing gear.

As you round out the flare pitch the nose up into a climb (or slow flight) attitude and hold off the runway. The increased drag from the nose-up pitch will cause the plane to descend gently to the runway.

Finally, leave the flaps down until exiting the runway. This is a good habit to establish for a future transition to a retractable gear airplane.

Well it sounds simple, doesn’t it?

Gary

Sunday, April 4, 2010

The Stress and Trauma of DME Arcs

When my instructor said we would fly DME arcs on my next lesson I was sure my day of reckoning had come. Yes, I had learned quite a bit of this IFR stuff already. I had even passed the FAA written test. However, I was certain that DME arcs would be the linchpin of my ultimate failure. DME arcs would finally prove to my instructor that I was too mentally deficient to learn to fly IFR safely.

I could hear him now, “You know, Gary, a career in air traffic control could keep you connected to aviation without the stress of IFR.”

DME arcs can sound confusing when they are explained or diagrammed on the ground. In the air the process becomes quite simple. This may be one of those issues in flying where it may be better not to try and figure it out on your own. Let an instructor show you so you don’t learn the wrong way to do it and complicate what is a very simple procedure.

I know this because I did try to figure it out on my own. I wasted a bunch of time and mental energy. This created an added stressor when my instructor announced we would fly our first DME arc. By then, I was convinced this was another of those mathematical quagmires that my feeble brain was not going to grasp.

Even when my instructor tried to explain and diagram them on the ground before our flight, my brain was fogged with my preconceptions over the damn things. Then we got in the air and flying the arc was so simple it was ridiculous. Flew my first one, and then a second one, perfectly.

Arcs are flown either clockwise or counter-clockwise (not right and left). Make a note of which way the arc will be flown.

While inbound to the DME arc, look at the heading indicator and note the heading that is currently 90 degrees from the inbound intercept course, and in the direction of the arc (clock-wise/counter-clockwise). This will be the heading to turn to for intercepting the arc. Make sure you pick the exact 90 degree heading (don't just get an approximate heading).

Set the heading bug on the 90 degree course.

Reduce the speed to approach speed. Do not try and fly the arc at cruise speed. The rate of change is too great to adequately make adjustments on the arc.

Begin the 90 degree turn 0.5 miles from arc - if the arc is 7 or more miles. If the arc is 5 or 6 miles you should start a little sooner.

Turn 90 degrees in the direction of arc. When wings are level, center the VOR needle with the OBS. Remain on this course until the needle deflects 2-1/2 to four dots in the direction of the VOR.

Now center the OBS again and immediately note where the magnetic heading is, on the VOR, 90 degrees from the centered OBS.

Now turn the plane to the heading indicated (90 degrees from the centered OBS).


On the above VOR, we have centered the needle after turning 90 degrees. If we have turned to the left (clockwise) we look 90 degrees to the left on the OBS which indicates 150 degrees. We now turn the plane from our present heading to the 150 degree heading. (Note that the VOR is not set for the heading we are flying - it is simply set for the radial we are on. This can be somewhat confusing when we are used to flying the same heading as the VOR.)


Now note the distance from the VOR. Is it greater or less than the desired arc? If the distance is greater/less than the desired arc, then on the next heading change add +/- 5 degrees correction to the next heading change.

As the OBS needle reaches 2-1/2 to 4 degrees from center - re-center the OBS and look 90 degrees to the left. This, again will be our new heading. Now is the time to add in any correction. In our example of a clockwise arc, turn +/-5 degrees less than indicated if we are beyond the arc and +/-5 degrees more if we are inside the arc.

Continuously monitor DME distance (on the GPS if you don't have a DME) but do not make small heading adjustments. Correct the heading only after you have re-centered the needle and select a new heading that will correct the under-shoot or over-shoot of the arc. Also adjust the heading to correct for any effects of wind.

You are flying a series of straight segments; not trying to fly a curve. Pick a new heading and stay on that heading.

Continue the process making heading corrections as required to remain within 1 nautical mile (or less) of the arc.

Note that as you fly around the arc the effect of the wind will change with the course changes. A crosswind may become a head-wind, or some other combination.

Turn to the final inbound course when approximately 20 degrees from final course line.

Simple, stupid.

Gary

Friday, March 12, 2010

THE DARK, FAT, UGLY TOAD


I went flying yesterday. I had this detailed lesson plan all worked out to practice VOR tracking and simulated instrument maneuvers.

During the preflight I missed sumping the right wing tank on the first pass. This caused me some minor concern. I always follow the same preflight sequence, so how could I miss it?

Then, after drawing a sample, I resumed the preflight.

As I inspected the left static port I realized that I had neglected to inspect the static port on the right side of the fuselage. I walked back around the nose and checked it.

WTF?

I try hard to concentrate on each task during the preflight. I don't rush. Yet, here I had made two mistakes in a row. The fact this had happened was troubling to me. Was this an indication that I wasn't mentally sharp enough to be flying today? This idea sat like a dark, fat, ugly toad in the back of my brain. Riidddup… Riidddup…

I dragged the plane from the hangar with barely enough strength to get it over the sliding door track. The task seemed to take every ounce of strength I had. The plane is heavy, the initial pull is a slight uphill and I’m no spring chicken, but I usually don’t have this much trouble. What the hell, dude?

My back had been a little sore before I got to the airport. As I climbed into the plane I realized the struggle to pull it out of the hangar had aggravated it even more. I also noticed that I was feeling a little tense as a combined result of making the pre-flight mistakes and the added pain from my back. Riidddup… Riidddup…

“Just relax and let’s go have some fun,” I tell myself.

I complete an uneventful start-up check list and, after talking to ground control, I taxi to the run-up area. It’s a beautiful day with a few clouds and light winds. I take some deep breaths and focus on the tasks at hand.

I start the engine run-up and the right mag sounds good and the RPM drop is where it should be. I switch to the left mag and the engine runs noticeably rough. I immediately check the mixture, which I have adjusted from lean during taxi to full rich for the run-up. The mixture is still on full rich so I try and listen carefully to the engine. “Are you sure it’s running rough?” I ask myself. I listen some more. “No doubt about it, it’s rougher than normal,” I answer myself.

I lean the mixture and, still on the left mag, run the engine up to 2000 RPM for 30 seconds. The engine smoothes out. The plane is now ok for flight but I find my stress level has now increased. What if there is something wrong with the mag? What if chokes on take-off?

“Don’t be silly and quit worrying”, I try to tell myself. However the toad has grown bigger and fatter and louder.  Riidddup… Riidddup…  

I get the takeoff clearance, roll down the runway and climb into the uncertain sky. I am airborne only a few minutes when I realize I am just not mentally along for this flight. I turn back to the airport and request a clearance for landing.

After bouncing down the runway I taxi back to the hangar. I push the plane back into the hangar and lock it, and the dark, fat, ugly toad, inside.

As I walk back to my car I pretty sure I heard it once more, Riidddup… Riidddup…

Gary
 

Sunday, February 28, 2010

Precision Approaches – Just the Facts, Ma’m


If you try and explain precision approaches in sentence form you can write for days. The nuances of ILS approaches or approach plates can fog the brain with minutia. My problem with these complex subjects is that the books or articles you read rarely just summarize the important data to help simplify the review of the subject. 


The following is a fact summary I have compiled from many different sources. The limitation to this summary for others is that I have only VOR approach capability. I do not have an IFR GPS or even a DME unit. Therefore, specific issues related to these approaches will not be contained in this list.

The Five Parts of a Localizer Approach
Localizer
Glide slope
Threshold crossing height
Outer marker
Middle marker

LOM: Locator Outer Marker - approx. 5 miles from the runway

LMM: Locator Middle Marker - approx. 1/2 mile from threshold and at about where the glideslope intersects decision height.

Localizer identifier always begins with "I" (dot dot) and frequencies are always on "odd tenths" - e.g. 108.1, 108.15, 108.3, 108.35

Localizer signal is 700 feet wide at threshold

If Nav receiver has 5 dots then each dot equals 300 feet at the outer marker

Needle readings may be unreliable more than 35 degrees from the course

Localizer is aligned within 3 degrees of runway centerline

Glideslope:
If followed to touchdown an aircraft would touch down on the fixed distance marker 1000 feet from the threshold
- the GS signal is not usable all the way to touch down. It becomes
unusable 18 to 27 feet above the ground
- signal is typically transmitted at a 3 degree angle
- at the outer marker the signal is approx 50 feet per dot
- it is common sense to fly at or above the glideslope as not much terrain clearance is provided
- on a bumpy day consider flying one dot high
- the MAP on a precision approach is called Decision Altitude (DA)
- on the marker beacon a " high" setting means reception over a greater area and less precise position identification. Normally set to low position. Turn up volume.
- the outer and middle marker beacons provide range information but neither is required for the approach. The outer marker is located at the approx. point where the glideslope intersects the intermediate approach altitude however it should not he treated as the final approach fix. Descent begins at the glideslope intercept point.
-         the outer marker flashes blue and emits dots at 120 dashes per minute. It intercepts the glideslope at the intermediate approach altitude – however it is not the final approach fix.
-         the middle marker flashes amber and emits dots AND dashes at 95 of each per minute. It is located approximately where the decision altitude is reached, although it is not used to identify the missed approach point.
-         The inner marker flashes white at a rate of 360 dots per minute and is located near the runway threshold
-         when decision altitude is reached there is no leveling off. Either you see the runway environment or you immediately begin the missed approach.
-         You can help verify the glideslope signal by comparing the crossing altitude at the outer marker with the altitude shown on the approach plate. A discrepancy means either a false glideslope signal, a malfunctioning glideslope receiver or the altimeter is incorrectly set.
-         The HAT, or Height Above Touchdown, are shown in small numbers after the MDA’s and DH’s in the minimum sections of the approach plate ie: 222/24 200. In this case the TDZE (touch down zone elevation) is 22 feet so the HAT is 200 feet.
-         TCH – threshold crossing height: The height above the runway where the glideslope intersects.

There are three categories of precision approaches:

Category 1: provides height above touchdown of not less than 200 feet

Category 2: provides height above touchdown of not less than 100 feet

Category 3: has no decision height

How To Intercept and Track The Localizer


Friday, February 26, 2010

Night Flight to Sacramento International (or: Three Legs, Three Serious Mistakes)


I recently flew a 3-leg flight from Santa Rosa to Sacramento, then on to Napa and finally back to Santa Rosa. The first leg would be flown at dusk. The last two legs would be at night. A waxing-crescent moon would help illuminate the way over California’s Sacramento Valley and the Napa wine country.

It had been a beautiful, uneventful, flight as I arrive at the outskirts of Sacramento International, call sign “Capitol Tower”.


The view over the Sacramento Valley at dusk enroute to Sacramento International.

Leg 1
"Cardinal 34777 do you have the airport in sight?" asked the tower controller.

Well, I thought I did.  Then, as my scan rotated out the left side window I notice two long and brightly lit runways disappearing behind my left wing tip. They look suspiciously like Sacramento International runways 34 Right and 34 Left.

Crap! Not only is this a rather large airport handling rather large aircraft, it is also sitting out in a field all by itself. How the hell did I miss those two huge parallel runways?

"I do NOW, " I emphasize to the controller, letting her know I realize I screwed up.

Not only have I missed runway 34 Left, I have already passed 34 Right! It will take a 135 turn to get back to 34 Left. Making sure the controller wouldn't prefer me to come in on the closer runway I ask,

"Capitol tower, confirm you want me on 34 Left?"
"If you can make it," she says in an accommodating manner.
" Willco, 34777."

So, where did I go wrong?

First, I had never been to the airport before and now I was trying to find it in the deceptive light of dusk.

Secondly, I had assumed that since it was such a large airport, I would have no problem finding it.

Lastly, I became fixated on a set of lights in the distance that I assumed must be the airport. Yet a quick glance at either my (very basic) GPS or out my left window would have revealed the two large runways clearly in sight.

  The lights I thought were KSMF are in the upper right of the photo. In fact, KSMF was off to the left of this photo (out of the picture).

Lessons Learned #1
  • When flying to an unfamiliar airport, even one you think will be easy to locate, view the airport and surrounding terrain on Google Earth prior to the flight and identify recognizable landmarks as reference points.
  • At an unfamiliar airport don't hesitate to let the tower know you are unfamiliar and ask for guidance. They are usually more than happy to help.
  • Try to avoid fixation on a point that you think is the airport if you are unsure - keep scanning and review the heading indication on the GPS.


    FINALLY, lined up for 34 Left!


    Leg 2
    Continuing my three-leg trip, it was full dark when I was ready to depart KSMF (Sacramento International) for APC, another short twenty-minute flight. The plan called for me to do a full stop at Napa and then return to Santa Rosa.

    It was here that I was to make the first of two identical mistakes. Even though I had my Iphone in my pocket I did not take the time to get an updated weather report for APC.

    I could either have called the ASOS  (which I had on speed dial) or I could have pulled up an Iphone application that would have instantly given me the info. Either effort would have taken no more than a minute or two. Instead, I chose to launch into the dark night (that held a real possibility of fog and clouds) without getting a weather update.

    Perhaps I was thinking that the moonlight would help me see any problems. That may have worked if there was only a single layer of clouds and fog. However, there was a thin overcast layer up in the flight levels that did not allow for full illumination usually associated with full moon on a clear night. 

    I repeated the same mistake at Napa prior to taking off for Santa Rosa.

    This is what is known as poor aeronautical decision making (ADM). In fact, it is the worst kind of ADM. It is the kind of decision-making that makes NTSB reports. It can leave loved ones wondering how such a thing could have happened, when they hear about your fatal accident.

    The National Transportation and Safety Board conclusion would read, "VFR flight into IMC with subsequent loss of control. There were no survivors."

    The NTSB records have thousands of similar reports. Other pilots would posthumously chastise me for my stupidity and mourn the loss of a good aircraft.

    This HAS to be the kind of mistake that, if you are lucky enough to survive it the first time, you absolutely cannot repeat it again. Writing this account down is my way of burning the mistake in my brain so that I do not forget it. Only time will tell if it has the desired effect.

    To my mind, if I don't recognize and try and correct the mistake, I will plant a small seed that grows into a future decision. "Well, I got away with it THAT time, so I'll probably get away with it this time."

    Lessons Learned #2
    • Always, always, get an updated weather briefing before departing each leg of a multi-leg flight. It is so easy with an Internet capable phone that there is no reason not to. This is especially true if the flights occur at night.
    •  Even a full moon and unlimited visibility at night is no guarantee of illumination if there is a thin cirrus layer that thickens during the flight. 
    • Aeronautical decision making for night flights must take into account the added risk factors. You cannot assume that a decision that is acceptable for a day flight will provide enough margin for error for a night flight.
    • A VFR night flight can turn into an IMC flight very quickly if clouds or fog are encountered.

    Leg 3
    Approaching STS after the tower closed seemed like a simple process. The visibility was perfect, there was no traffic And no wind. Even I couldn't screw this up, right?

    Wrong.

    The tower had just closed and I thought it was kind of cool that the busy airport, that always required communication with the tower, was now an uncontrolled field.

    The airwaves were silent and so the entire airport and runway were all mine. Mostly because I could, I clicked the mic button seven times and watched in awe as the massive MALSR lighting system went to full bright.

    With the airport glowing like downtown Las Vegas, I wouldn’t have to worry about missing this runway, I thought.

    I called on the CTAF that I was entering the right 45 for runway 14. A few moments later I called right downwind for 14 and then the base turn to 14. 

    Then I noticed the ILS lighting below me, which you will remember, I had recently turned up. Slowly the realization that Runway 14 doesn't have an ILS crawled out of the dark space of my mind.

    "Uhhh, 777 is turning final for runway 32,” I say extra loud, “Repeat, Triple 7 is turning final for runway 32, not 14, at Santa Rosa.”

    Dohh!!!

    Lessons Learned #3 
    • This seems to be a mistake that I continue to make over and over again. Mis-identifying runways is perhaps understandable for new pilots but there shouldn’t be any excuse for experienced pilots. I am going to add a new item to my airport approach checklist – “Runway verification? – Check.” 

    Learning Lessons
    I have learned that there is no such thing as a perfect flight. Every single flight I make will have some mistakes. Some will be minor and some will have the potential for a deadly outcome.

    Most serious accidents are the result of a chain of events.

    Something small goes wrong with the aircraft or the flight. Next, the pilot makes a small mistake. So far the minor issues are manageable. No problem, just fly the plane, says the pilot to himself.

    Then one more thing happens that, when combined with the earlier issues, suddenly presents a very serious problem. Link number three in the accident chain has just occurred. Now the outcome of the flight is no longer certain.

    In order to reduce the number of possible links in an accident chain, pilots must continuously and proactively strive for perfection. While it may, theoretically, be an impossible goal, every lesson learned is one less link in your next accident chain.

    Gary